Vanilla Almond Cupcakes before Christmas

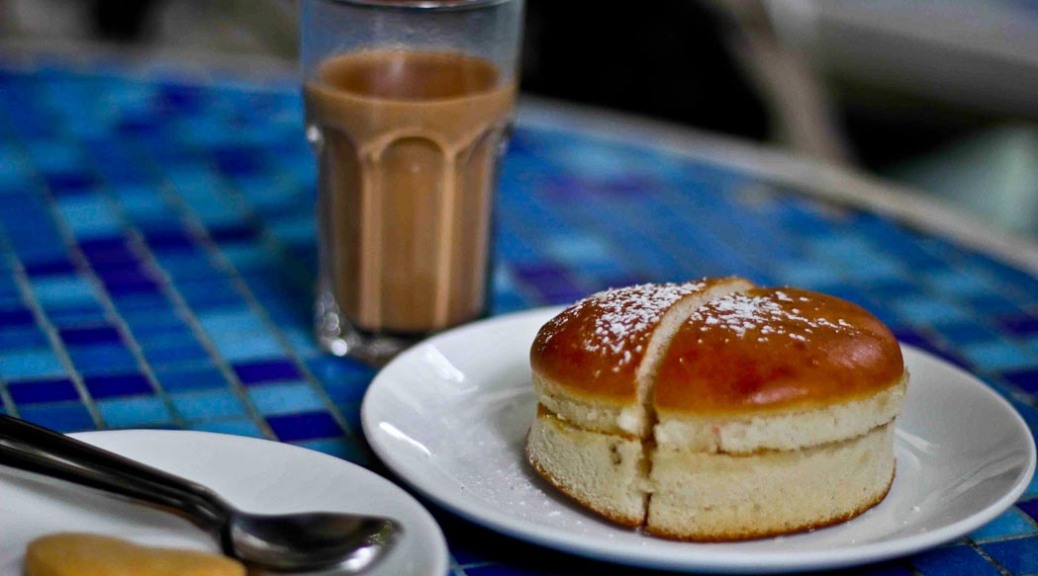
Why BEFORE Christmas?

Because my OTG is brand, friggin’, shiny new and I wanted to test it once, before diving into silky batters, fluffy dough beds, tiny yeast puddles or for that matter a velvety cheesecake bed with strawberries for cozy blankets.

A couple of friends might visit on Christmas Eve and they are expecting a fresh homemade cake. I want to really not disappoint them with a plate full of a half cooked gooey mess, that I would call a ‘cake’

I decided to begin with a cupcake because they are tiny and cute and so so handy. Plus I had also purchased a crisp set of cupcake liners that the child inside of me was dying to use.

Now what exactly is a cupcake? I’ve recently found out that a cupcake its the one that’s made by mixing the wet ingredients and dry ingredients separately and then folding them in together.

Turns out baking terms are not as easy as they sounded before I started baking. I might want to do a post about them soon. Until then here’s the recipe for the yummylicious vanilla cupcakes full of crunchy almonds and nutty fragrances. I’ve been getting too many pings for the recipe of this one, since I’ve posted the pictures on the page, so this comes on popular demand.

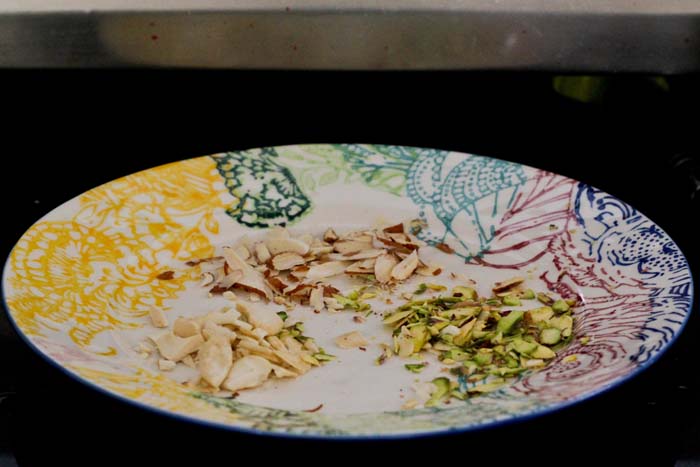
I happened to find the recipe on this amazing blog and I tweaked it a bit. Firstly I added less sugar than recommended as I wanted the flavor of the almonds to shine through. Secondly instead of slicing all the almonds, I sliced half of them and cut the remaining half into chunks. Believe me it tastes really good when these chunks land up under your teeth. And finally I completely ditched the frosting for a version of my own. Since I’m not a big fan of hard, sugary frosting on top of my cakes, I did a flowy version, the kind my mom used to make to go on my home-baked birthday cake when I was little.

The problem with typical frostings is they demand for too much sugar which makes them too sweet and granular to go with humble cakes with light, nutty flavors. These frostings are extremely concentrated and the size of it is as big as the base itself. Which means, when one bites into them, they take up a lot of space on your tongue for you to even slightly taste the base. In no way do they go hand in hand with the base.

Yep. Sugary (buttercream) frostings just got lawyered, people! I might try making sugary frostings with plain cakes, but not with the ones that are complete with nuts and flavors by themselves.

So my (or my mother’s) version of the frosting turned out to be a win win for me as the sweetness tingles on the tongue and the sugar granules cozily wrapped in the milk and butter crackle in the mouth right before the subtle flavors of the cupcake merrily dance around satisfying the taste buds.

Here’s the recipe for the cupcakes and frosting (my way):

What I gathered:

For the cupcakes

1 1/2 cup flour (maida)

A little more than 1/2 cup powdered sugar

2 medium sized eggs

1/2 cup softened, unsalted butter

2/3 cup buttermilk

2 tsp baking powder

1/4 cup sliced almond, 1/4 chopped almond chunks

1 teaspoon vanilla extract

1/2 teaspoon almond extract

A pinch of salt

For the frosting

2 tbsp softened, unsalted butter

1 tbsp milk

1/2 cup sugar

2-3 drops of vanilla extract

A drop of almond extract

How I put it together:

The cupcakes

I set the oven to preheat at 200 degrees C with the top and bottom elements on while I gathered everything ‘white’ on to the counter top. Clockwise starting with the blender jar: buttermilk, almond and vanilla extracts, eggs, flour with baking powder, butter, powdered sugar and almonds in the center.

IMG_1351

As I said, the dry and wet ingredients need to be mixed separately before being put together, while making cupcakes. I began with the wet ingredients.

IMG_1355

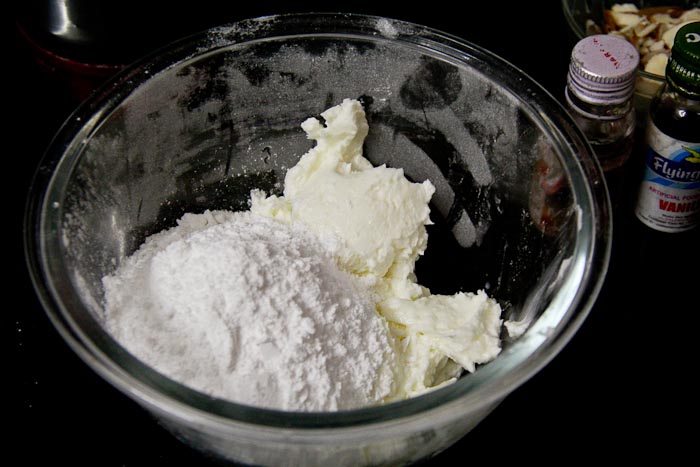
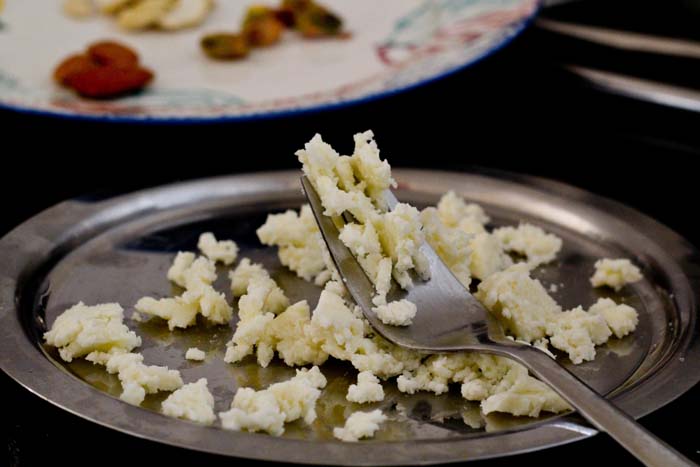
In a mixing bowl, I whisked the butter and sugar until the mixture was light and fluffy. Added eggs one at a time beating them individually into the batter. Added the vanilla and almond extracts and mixed them well. Added half the buttermilk to this.

IMG_1357

Took another bowl and and sifted the flour into it along with the baking powder. Topped it with almond slices and chunks, so they get somewhat evenly placed into the dry mixture.

IMG_1356

Added the dry mixture in parts, into the the wet mixture along with the remaining buttermilk and blended it until it was smooth and had no lumps.

IMG_1360

Lined the cupcake tin and filled each of the liners upto 3/4th full.

IMG_1362
perfect amount of filling. anything more than this will make the cupcake batter spill over as it rises in the oven

Baked at 170 degree C for 20 minutes.

IMG_1372

The trick is to keep checking every now and then and get them out when an inserted toothpick comes out clean.
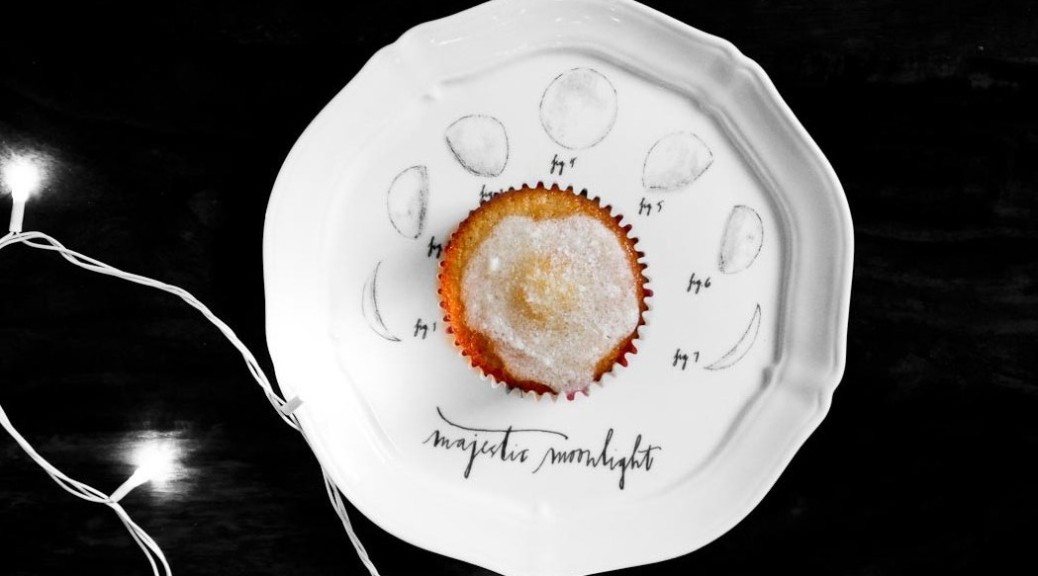
And they’re ready.

IMG_1400

IMG_1405

IMG_1409

Perfectly moist and spongy. Take a look at the texture. They disappear in seconds, mind you.

IMG_1366

The frosting

I beat the sugar and milk into the the butter and added the extracts. Dropped this runny frosting on the cupcake just enough so it didn’t spill over.

I made sure the cupcakes cooled down completely before I poured the frosting.

IMG_1450

What I say: 

Well they are easy to make and foolproof. Took me about hour to get them done, cooling and frosting excluded, which further took another 15-20 minutes.

IMG_1361
liners filled up too much

There’s just one mistake I made. In the first batch I filled the liners too much.

As a result, the cupcake batter kind of spilled over and ended up having muffin tops. The tops then further became crunchy and burnt a little. It did not taste bad at all, but the perfectionist husband ended up picking the crunchy parts off and putting them away, which then I had to eat, in order to prevent wastage.

IMG_1364

So the only thing to remember is to fill only 3/4th of the liners as it shows in the earlier pictures.

Otherwise making these cupcakes is a piece of cake. 😉 Perfect for your Christmas celebrations.

IMG_1446

Give them try and let me know how they turned out.

Happy holidays you guuuuys. 🙂

Grandma makes Aamla Juice – Guest Post

Okay so its not really Aamla Juice. Its a concentrate that makes Aamla juice when added with water. I just wanted the title to sound a bit ‘newspaperish’.

My family surprise-visited me on my birthday, and that was all I have wanted this year, as it was going to be my first birthday away from family, friends and my hometown, after I got married. It was one of the best surprises I’ve ever gotten and to add to it, my grandma decided to stay back for a couple of weeks. I couldn’t be more happy.

There and then I decided to completely let my Aaji supervise over me in the kitchen. This was a better way than having to keep asking her cooking related questions on the phone over the pettiest of issues.

My sweet mother is so organised, she knew I would want to make this juice as soon as she had earlier informed me on the phone that fresh Aamla fruits had hit the market, that she got with her a fresh, handpicked stock of the fruit. Just because. Just so that I would not have to go through the trouble of picking out the fruits and worrying about if I’ve picked the right ones. Ah, mothers!

Aamla is an amazing fruit. Apparently its called Indian Gooseberry, and the name kind of takes the charm out of it. Anywho, its very difficult to eat this fruit directly as its unbearably sour, but the juice on the other hand is yummy yum yum. Plus its full of anti-oxidants, vitamin C and calcium and lots of other things that I don’t remember.

So I decided to make my grandma make it for me. Here’s how she did it…

What she gathered:

1 kg Aamla fruits – fresh, slightly green-yellowish and big juicy ones.

3 cups sugar

5-6 medium size, ripe lemons

About a handful of ginger, washed thoroughly and peeled

1 tbsp salt

How she put it together:

Firstly she washed and cleaned them and wiped them off roughly with a towel.

Then she cut them and separated the pulp, by removing the seeds. This is a bit time consuming, boring and difficult. Do make sure to be careful with sharp knives as they might slip off the perfectly round and hard berries and hurt your hands.

WP_20141125_005

If you are a recycler, you would probably want to save those seeds for later. I will tell you what to do with them.

IMG_0611-2

She chose a big pan from and tied a clean muslin cloth to it. This was to strain the berry pulp.

IMG_0616-2

Then she peeled the ginger and added it to the grinder along with the Aamla.

Oh by the way, I use these peels in my chai. But I have to make sure all the mud has been removed while washing the ginger.

IMG_0684-2

She then ground the hard pulp from the berries to a paste, first without adding water.

IMG_0615-2

After having ground the Aamla to a slightly coarse paste, she added some water (not too much) and continued to grind the it further.

IMG_0619-2

After having obtained a fairly smooth paste, she poured it on to the muslin covered pan and squeezed all the juice out of it.

IMG_0623-2

IMG_0628-2

This is how it looks after having squeezed all the juice out. Save this as well for later. I will tell you at the end of the article what to do with these leftovers.

IMG_0637-2

IMG_0640-2

Meanwhile she measured 6 bowls of sugar.

IMG_0638-2

Mothers and grandmothers never required measurements charts and weighing scales or measuring cups. They did everything in approximation and everything turned out perfect. But we’re beginners. So I would say this bowl is approx. half a cup. That means she added around 3 cups of sugar to a pan and filled it with water until the sugar was all drowned and a little bit more.

IMG_0643-2

She put it on the stove and kept stirring until the sugar dissolved and poured the extracted aamla + ginger concoction into the sugar syrup.

IMG_0648-2

Then she freshly squeezed the juice out of the lemons and added it to the mixture.

IMG_0653-2

IMG_0666-2

And I decided to save and reuse these lemon peels too.

IMG_0657-2

Meanwhile Aaji topped the syrup with a bit of salt and viola!

IMG_0669-2

After the syrup cooled down entirely, she poured it into a glass bottle.

IMG_0687-2

And that’s that.  This syrup stays for a month. Although it’s so refreshing and yummy, it won’t last that long.

IMG_1345

I add one part syrup and two parts water. I like a concentrated version. Some like a diluted version of it, which means more water can be added.

IMG_0688-2

What she says: 

Nothing. She made it with love and waited for me to have it.

I say go make it. It’s delicious. It has health benefits. It’s perfect after having spent the entire day in the scorching sun. I also think the whole sugar syrup process can be dropped and a sugarless juice can be prepared and stored. Honey can be added to it at the time of consumption. Although this version would require to be finished as fast as possible.

Now for the Aamla remnants, lemon peels I had saved. I dried them in the evening (as the rays are not very harsh) and stored them all in an airtight bag.

IMG_0675-2

IMG_0677-2

To this I’m going to add Sheekakaai and Reetha to make a mixture which I can then store and use as hair rinse.

Just add the mixture to boiling water, strain it and rinse your hair with it. Works like magic! Grandma’s promise.

If I get time later, I will try and write a post about this hair rinse and link it here.

I will go have the juice now. Ciaos!

Fastest Dessert Ever with Strawberries and Bananas

Its something that happens almost everyday with me. I get a sudden craving for something sweet. And the healthy and fit husband always wants to join me in a food crime, instead of trying to snap me out of it.

So why not just eat a sugar loaded fruit? Its healthy too no?
No. My mind knows but the tongue, heart and stomach disagree. They want something creamy, gooey, bad, loaded with delightfully blended sugar.

So if there’s still a way to add some amount of goodness, its this.

Add fruits to condensed milk. Condensed milk. Ah the heaven. I believe I can gulp this down entirely if I ever put the can to my mouth. But I make sure I never try to confirm this belief of mine. If I do it ever, it will be a day of catastrophe.

Anywho, here’s how I made this lovely, easiest dessert, if you still haven’t figured it out.

What I gathered:

About 8-10 medium sized strawberries

1 tiny elaichi banana

1 tbsp condensed milk

How I put it together:

Easy peasy. Chop the fruits in to big chunks or tiny bits. Your wish.

a (3)-2

Mix them up in a bowl and add just 1 tbsp condensed milk. Even 1tsp will do. Trust me you don’t need a lot. You will be doing yourself a favor that way.

a (2)

And viola!

What I say:

Don’t just gulp it down. Savour it.

Try variations. I’m sure Kiwis will work like a charm in this recipe. Mangoes too.

Here’s a health tip that I learned recently and don’t seem to digest as easily as this dessert.

Any thing sweet, eaten at night, after a big fat dinner or even a small sufficient dinner, goes directly to your heart in form of triglycerides. Yep. Not to your butt. That would have been acceptable. But it goes straight to your heart. And here’s the funny part. This includes fruits too. (Even though they have natural sugars)

So the tradition of cutting fruits and passing them to each member of the family after hearty dinners, is about to go down the drain. The most one can have, if hunger strikes after dinner, is skimmed milk.

So peoples. Eat at your own risk 😉
Like I did.

Bun Maska and Chai – German Bakery

My friends from Mumbai visited us recently. And what a weekend it was. Pune is known for its youth culture, software engineers and enthusiastic families. And restaurants and cafes are absolutely flooded with this cheerful, energetic crowd. German Bakery is one of such places.

A few years ago German Bakery had been in the news for very tragic reasons and it gave me shivers to visit the place, thinking about the families that have lost their loved ones in the bombing.  Nevertheless I did visit.

German Bakery is located in one of the poshest areas of Pune, i.e Koregaon Park. Its a few steps away from Osho’s Ashram, which makes it a great attraction for foreigners. So expect a global menu, most of which is meant to please our guests.

We were greeted with tough security, like those in malls, at the entrance, which wasn’t a shock. But the place was quaint like a cozy nest, full of white tables and chairs and colored mosaic table tops, graffiti on the walls, a Deutsche bakery counter and a typical glass counter filled with baked goodies surrounded with funky pictures downloaded off the internet, neatly framed and hung on the walls.

IMG_6008

IMG_6005

IMG_6021

We ordered Bun Maska and Chai. Now when one orders chai and bun maska, one expects it to be pretty cheap. Yeah, well it wasn’t.

The chai was a pretty good one though. Milk perfectly blended with chai-ki-patti. The kind that has been re-boiled until it gets thick and creamy. Tea happened to be a bit on the stronger side and chai masala was mild. Sip it up quick, or it gets cold really fast. Pune’s weather is crazy, I tell you.

IMG_6014

The bun was rather a small one. And maska happened to be the home made white, unsalted butter that our would grandmothers make. It was rather generously slathered and most of it had seeped into the bun, which had tiny pieces of those colored jelly like chunks. Fruit bun they call it.  I loved how the top of the bun was beautifully covered with powdered sugar sprinkled all over. It just sweetly tickles your tongue and melts into your mouth while you bite into the soft English bun.

There was a happy surprise too. The order came with a plate of two complimentary heart shaped cookies. Basically they were the standard naan khataais in a cute shape. So nothing special about them apart from the fact that they don’t get listed on your bill.

IMG_6013

What I say: Overall a great eat. Do visit if you want to try an English and classy version of bun maska. Don’t go if you can’t stand anything modifications of the typical Irani, oddly shaped, dripping with butter bun maska.

It looks: Quirky! With iron tables and benches, which a a bit uncomfortable to sit on. Lighting is pretty dull, which might be their idea, but didn’t amuse the way it should have. Mosquitoes? yes!

IMG_6033

IMG_6006

IMG_5991

IMG_5989

They serve: Okayish. Not too quick, not too slow. Acceptable, considering one goes to such places not in a rush, but to relax and kill time.

What made me smile: Their bright and colourful mascot, the owl. The lit up banner of the German Bakery. And the way the bill shows up in a tiny cane box. Do check out their cute owl-y illustrations describing types of coffee.  Coffee lovers will get it.

IMG_6023

IMG_6026

IMG_6028

Money matters: 50 Rs. for Bun Maska , 70 Rs. Chai. (has to be one of the most expensive teas I’ve had. Heart shaped cookies for free.

IMG_6018

Everything about Saffron

Saffron. Kesar. The one spice that makes me go weak in the knees. The color, the aroma, the flavor, everything’s a catch.

However this is said to be the most expensive spice in the world. And while I’m no investigator, I like to believe that, since I just bought my very first packet last month for about 200 Rs a gram.

IMG_7386

Took me two weeks of waiting and a lot of courage to open it. I finally managed to gather the guts and rip it open and use a few strands to make this.

I remembered from some time ago when I’d seen saffron covered up in fungus, as the tiny plastic boxes they come in are not so strong or air tight.

Saffron strands are actually the stigmas from saffron flowers. They are dried and fermented a bit. Three stigmas come from one flower. So the entire tedious process of planting and harvesting just to produce such a tiny amount, is what makes it so expensive.  Although a tiny strand goes a long way to release a good amount of color and flavor to your food.

About 500 stigmas make 1 gram of saffron. And 1 part saffron to 1,50,000 parts water can turn the water yellow and leave a notable flavor. So its always worth it.

IMG_7792

So here is what I have learnt about buying and storing them…

How I bought it:

Saffron is available as threads i.e the whole stigmas or ground. Whole stigmas are your best bet as they retain flavor for long and you can kind of be assured that they are pure as can be seen. Ground saffron tends to lose flavor pretty early. Plus they might be adulterated. So I asked my mom to buy this airtight packet for me which contains a little plastic box inside.

How I stored it:

It needs to be stored in dark, shady, cool and dry places in air tight containers. Also its better if the container is small. That way there’s less space for air circulation.

IMG_7790

So I decided to use this tiny honey bottle. I cleaned it, allowed it to dry and wiped it with a soft cloth.

IMG_7785

I transferred the saffron strands to the bottle and shut the lid tight.

IMG_7799

IMG_7803

Saffron loves dark places as it is sensitive to light. So I covered the bottle further with a piece of aluminium foil.

IMG_7806

That way it won’t lose flavor, color and aroma that quick.

IMG_7809

And done.

How I use it:

They say 6 months is the time period for benefiting your food with maximum flavor.  So don’t forget to get it out and use it up. Most of the times the expiry date does not indicate the date that makes it unfit for consuming. It just means it will start to lose its qualities gradually. So I use in my kesar almond milk, biryani, chaai, sweets, kheers, basundi, gulab jamuns, nimbukesar sherbet and many more recipes.

Most of the time I soak saffron strands in warm milk for a couple of minutes and I use the milk in my food. This can be done even in water. The longer it steeps the stronger the flavor and colour.

If I require ground saffron, I gently toast the strands on a pre-heated pan and then grind them with a pestle. This needs to be done with caution as they can burn in no time.

And finally before adding them to food, I crush them a bit using my fingers. While doing this I make sure they are pre-soaked in milk or water and the crushing happens while they are in there, as otherwise most of the flavor and color might end up on the fingers instead of the food.

Here’s something cute:

Many cooks have come up with an economical way of using and re-using saffron strands. They steep a few strands in a few tablespoons of hot liquid for 10 minutes, use the liquid in their recipe, then dry and reuse the threads a second time. I’m soon going to try this out. Although drying and storing them again is going to be a pain.

That’s all about saffron. Enjoy. Do sniff it once in a while. Just the heavenly aroma will make you want to cook up something saffrony!

Paneer Kheer

I always crave something sweet. Most of the time I try not to go out of my way to have it. Recently I came across a lot of recipes of sweets for festivals and thought, why not make one just because. The goal was to make something sweet and creamy using ingredients that are always right there, in the fridge or on the shelves. I’ve been totally working out lately, so I can absolutely justify diving into these pleasure pools once a while. Except that it really ins’t once a while.

Anywho there’s always milk and paneer lying around in my fridge waiting, wanting and begging to make it into something more exotic than chaai or paneer paranthas. And today I gave them a chance. They did amuse me.

I usually only have to cook for myself and the husband. Needless to say, the quantity of ingredients are only enough to serve two. Surprisingly right after I finished making the kheer, the husband called in to inform that one of his friends would be visiting. And I thought to myself, ‘Hey, share your share! What better way to earn goodwill aaannd put on less amount of fat around your already fattened tummy’.

What I gathered:

200 ml skimmed milk

1 tbsp sugar

1 cardamom pod (elaichi)

2-3 almonds (slivered)

3-5 cashews (roughly chopped)

3-5 pistachios (slivered)

25 gms cottage cheese (paneer)

3-5 saffron strands (kesar) or saffron syrup

A tiny pinch of salt

How I put it together:

About 200 ml milk is enough to serve 2 people, considering one eats it as a sweet dish. I always use skimmed milk. Saves me malai with ghee yielding potential. Plus the low fat version is healthier. Although traditionally full cream milk makes a richer, creamier kheer.

IMG_7323

In a thick bottomed vessel, I put milk and set the stove on low flame. A thick bottomed vessel is preferred because otherwise the milk sticks to the sides and bottom and burns. And trust me. Its not easy to wash it later.

IMG_7325

After it came to a boil, I let it simmer until it got reduced to less than half its size. Its important to keep stirring and scraping the milk solids stuck to the sides of the pan and adding them back to the boiling milk.

Added 1tbsp sugar to this. I tend to use less sugar as too much of sweetness might suppress the flavours of other ingredients. More sugar can be added according to the likes.

IMG_7328

Smashed open the cardamom pod and discarded the outer shell.

IMG_7336

Later I ground the cardamom seeds in a mortar with, obviously, a pestle, until I had a fine powder.

Immediately gathered the nuts and sliced and chopped them according to requirements. I must confess, I popped a few into my mouth. It’s really hard to resist.

IMG_7343

IMG_7369

IMG_7373

The paneer was weighed and crumbled with the help of a fork. There’s actually no need to weigh it. I do just because I’ve had this scale for a long time and I keep looking for reasons to use it.

(Its better to do these things before setting the milk on the stove.  That way full attention can be later given to scraping and stirring and saving the utensil.)

IMG_7356

IMG_7366

Meanwhile the milk had been reduced and thickened. To that I added the cardamom powder and the nuts. I saved a little bit of nuts for sprinkling on top of the kheer, before serving. Because it looks good and because I’m a bit of a show-off.

IMG_7380

Now I added the crumbled paneer. Its quite possible that even after having evenly crumbled it, the paneer will still be lumpy. The kheer can be later beaten with a blender for an even texture. I let it be the way it was.

IMG_7383

Notice how the sides or the vessel are totally ruined. I had a hell of a time cleaning that. Here’s a tip for the ones like me, who like to wash it themselves. Pre-soaking the vessel helps a lot.

Got it to a final boil and turned off the flame.

Aha! This was my favorite part. My mom had sent me this little packet of saffron from Mumbai after a lot of nagging from my side. And I had been dying to open it. I added about 4-5 strands. This needs to be done while the kheer is warm. I also added a little bit of saffron syrup I’d purchased from Mapro Panchgani on a recent trip. Its really a keeper. Do give it a try.

IMG_7386

IMG_7391

Saffron releases colour and gives the kheer a beautiful flavor and aroma. Once you add a strand into the hot kheer and closely look at it, you will be able to see a crimson and yellow aura around it (see pic below). That’s right, I’m crazy about saffron.

IMG_7396

And finally, I concluded it with a little pinch of salt. Just a hint. But its very important to do this only after the kheer is thick enough and cooled down. Rushing the salt might spoil the milk. Although this step is completely optional, I like how a tiny grain of salt further sweetens the kheer a bit. My ma taught me this.

IMG_7398

That’s it. All done. I poured it into a mug and gulped it down.

IMG_7413

That’s not how we served it to the friend though. He got a bit of a royal treatment.

IMG_7447

Ah sweetness! Right in time for the warm sip on a chilly evening in Pune.

IMG_7470What I say:

Have this warm or chilled. Gulp it down straight in or have it with pooris. Add chunks of strawberries or apples or pomegranate seeds.

It’s going to taste delicious.

that's how we roll in the kitchen!